
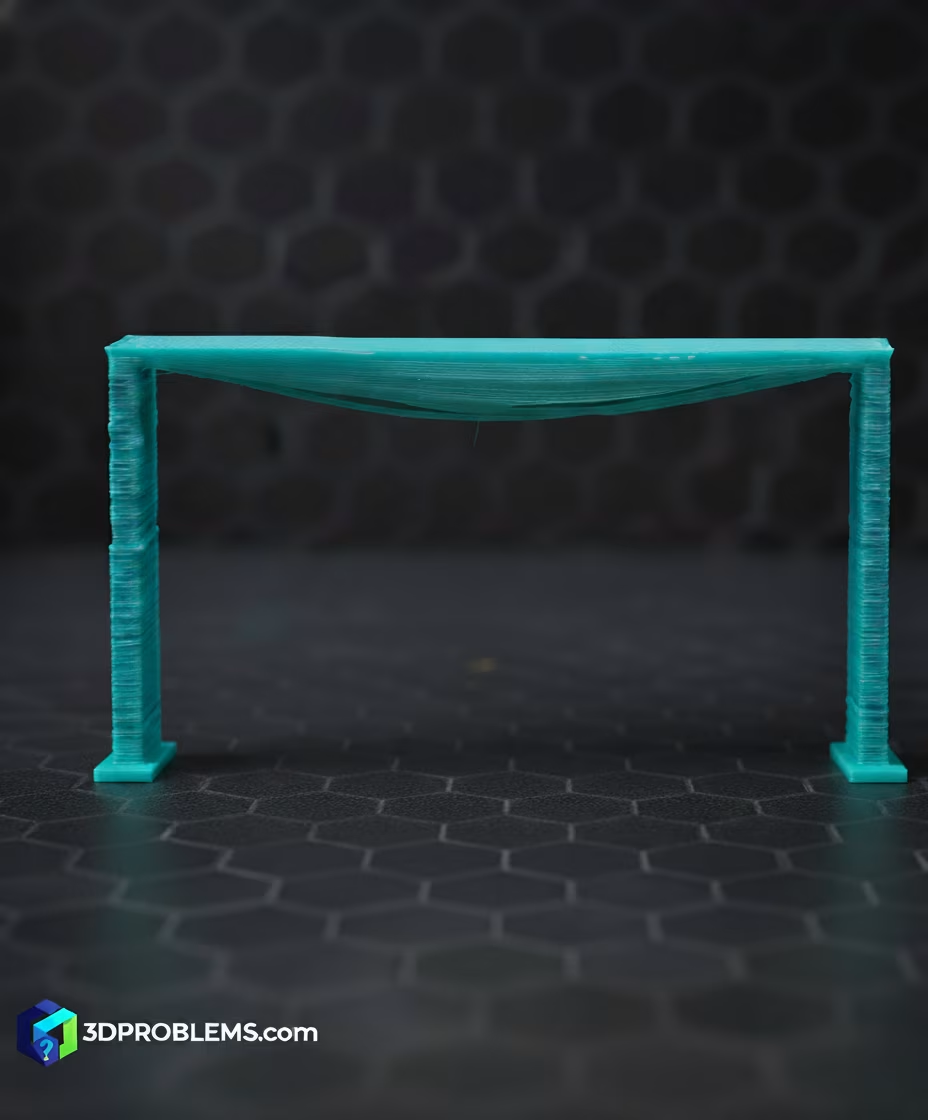
Fix poor bridging, sagging, or broken spans in your 3D prints. Get the ultimate guide to solving 3D print bridging problems & mastering bridging settings.
The key to fixing poor bridging is maximizing cooling, minimizing flow, and optimizing the speed to ‘string’ the plastic across the gap quickly and accurately.
What Causes Poor Bridging?
Poor bridging is primarily caused by gravity acting on molten plastic that hasn’t had time to cool, combined with inadequate control over material flow and deposition speed.
The fundamental process is:
- Insufficient Cooling: The plastic is too hot and remains molten for too long, allowing gravity to pull the suspended lines downward before they solidify.
- Excessive Flow: Too much material is extruded, leading to heavy, thick lines that are more susceptible to sagging and collapsing under their own weight.
- High Print Speed (Initial Span): While speed can sometimes help string the material, if it’s too fast, the lines may not stick to the anchor points. If it’s too slow, the lines sag instantly.
- High Printing Temperature: A temperature set too high keeps the plastic highly fluid, increasing sag.
- Long Span Distance: Attempting to bridge a distance that exceeds the printer’s mechanical and cooling capabilities.
The primary factors you need to control are Cooling Fan Output, Flow Rate (Bridging Flow), and Bridging Speed.
Cura Poor Bridging Fix: Essential Settings
Cura settings offer specific control over the flow and speed used only for bridging moves.
1. Bridge Fan Speed
- Cura Setting: Found under Experimental-> Bridge Fan Speed.
- Function: This sets the part cooling fan to maximum power specifically for bridging moves. Maximum cooling is essential.
- Actionable Advice: Set the Bridge Fan Speed to 100%(depends on your filament). Ensure your fan duct directs air effectively onto the bridging area.
2. Bridge Flow
- Cura Setting: Found under Experimentaş-> Bridge Flow.
- Function: This reduces the amount of plastic extruded during the bridge, making the lines lighter and tauter, which minimizes sagging.
- Actionable Advice: Reduce the Bridge Flow significantly, typically to 75-90%. You want a minimal amount of material that can still fuse and anchor.
3. Bridge Speed
- Cura Setting: Found under Speed -> Bridge Speed.
- Function: The speed at which the bridging lines are printed. A balance is needed: fast enough to string the plastic, but slow enough to anchor.
- Actionable Advice: Reduce the Bridge Speed to a slow, controlled rate, often 15-30 mm/s. A slower speed gives the cooling fan more time to freeze the plastic immediately after deposition.
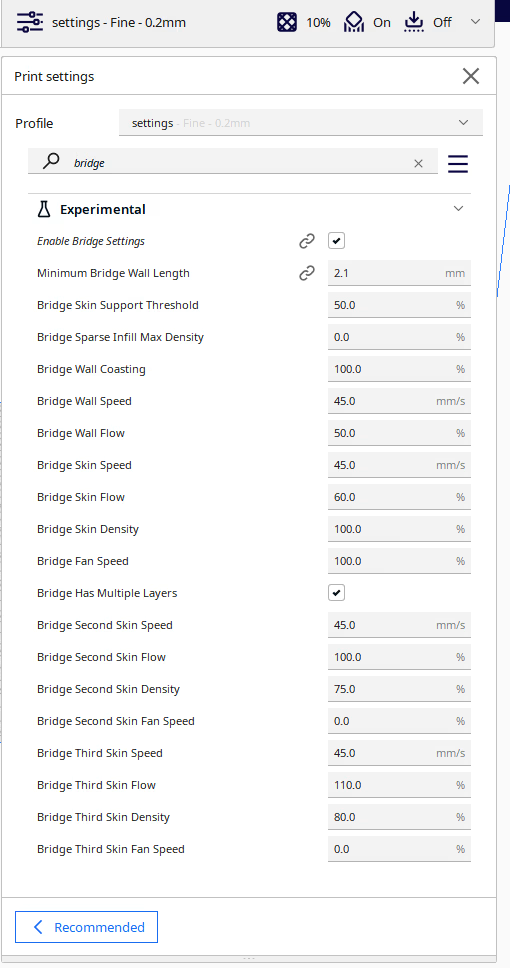
4. Bridge Skin Support Threshold
- Cura Setting: Found under Support -> Bridge Skin Support Threshold.
- Function: Determines when the slicer should use supports for the bridging area.
- Actionable Advice: If bridging still fails, consider reducing the Bridge Skin Support Threshold to force supports under longer spans.
Prusa Slicer Poor Bridging Fix: Essential Settings
PrusaSlicer settings focus on the bridge flow ratio and print speed.
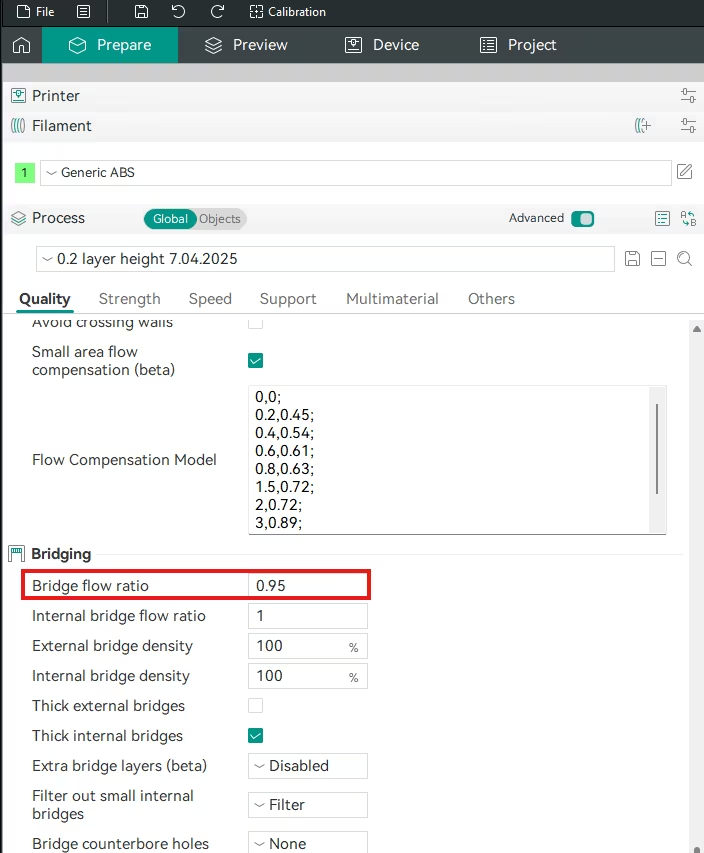
1. Bridge Flow Ratio
- PrusaSlicer Setting: Navigate to Print Settings -> Advanced. Look for Bridge flow ratio.
- Function: Reduces the material volume for the bridging layer to create lighter, less sag-prone spans.
- Actionable Advice: Reduce the Bridge flow ratio to 0.75-0.90 (75-90%).

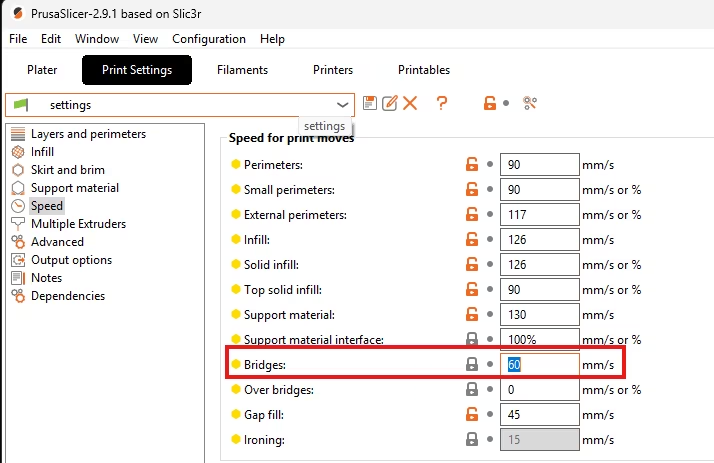
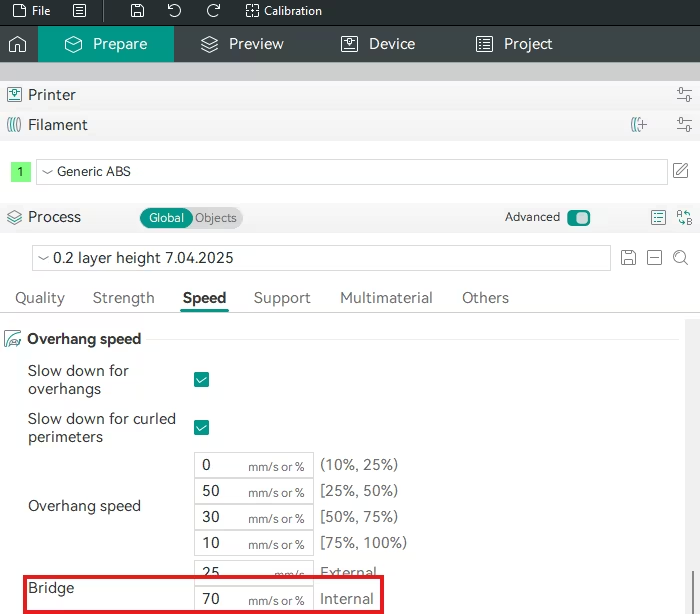
2. Bridge Speed
- PrusaSlicer Setting: Navigate to Print Settings -> Speed. Look for Bridges.
- Function: Controls the speed of the horizontal span.
- Actionable Advice: Reduce the Bridges speed to 15-30 mm/s.
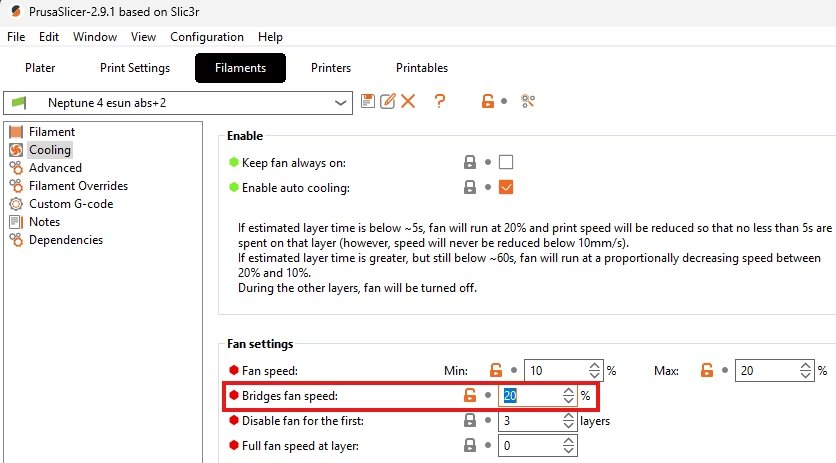
3. Fan Speed
- PrusaSlicer Setting: Navigate to Filament Settings -> Cooling. Look for Max fan speed.
- Function: Ensures maximum cooling is available for the bridge.
- Actionable Advice: Set Max fan speed to 100%(depends on your filament). Verify the Slow down if layer print time is below setting is not interfering with the bridge speed.
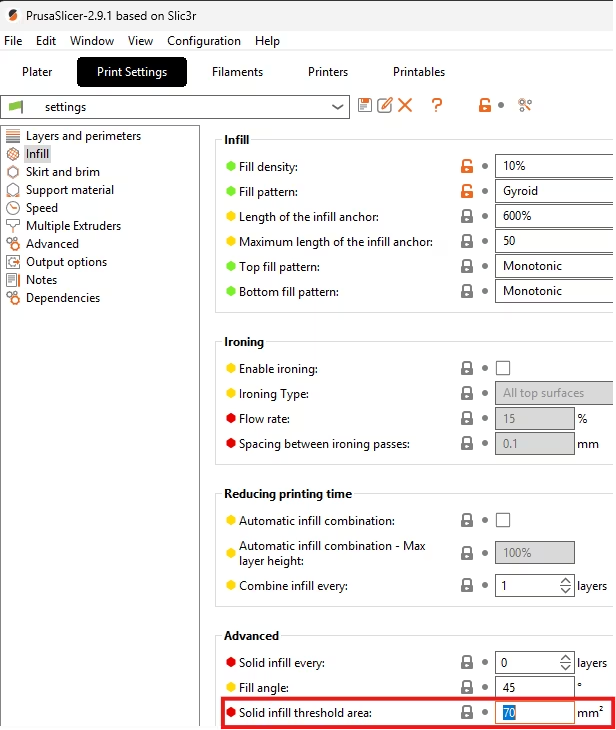
4. Solid Infill Threshold
- PrusaSlicer Setting: Navigate to Print Settings -> Infill. Look for Solid infill threshold.
- Function: If the area above the bridge is solid, this applies to the subsequent layers.
- Actionable Advice: Ensure that the layers immediately following the bridge are printed at a conservative speed until the structure stabilizes.
Bambu Studio And Orca Slicer Poor Bridging Fix: Essential Settings
Bambu Studio and Orca Slicer settings offer explicit controls for the bridging movement.
1. Bridge Flow Ratio
- Orca Slicer Setting: Navigate to Quality Settings -> Bridgin tab. Look for Bridge flow ratio.
- Function: Controls material volume for a taut, light bridge.
- Actionable Advice: Reduce the Bridge flow ratio to 0.75-0.90.
2. Bridge Speed
- Orca Slicer Setting: Navigate to Speed tab. Look for Bridge speed.
- Function: Controls the print speed over the gap.
- Actionable Advice: Reduce the Bridge speed to a slow, controlled 15-30 mm/s.
3. Max Fan Speed
- Orca Slicer Setting: Navigate to Filament Settings -> Cooling tab. Look for Overhang and external bridges fan speed.
- Function: Ensures maximum cooling is available.
- Actionable Advice: Set the Max fan speed to 100%(depends on your filament).

Universal Non-Slicer Fixes (Must-Do)
If bridging still fails, the issue is fundamental hardware or temperature:
- Lower Printing Temperature:
- Action: Reduce the overall Printing Temperature by 5-10°C (within the filament’s safe range). Lowering the temperature makes the plastic less fluid and reduces sagging significantly.
- Increase Part Cooling Fan Power:
- Action: Verify the Part Cooling Fan is running at 100%(depends on your filament) and the fan duct is aimed correctly. An upgrade to a higher-volume fan (e.g., 5015 blower) often provides the necessary instant cooling.
- Clean Nozzle Tip:
- Action: Ensure the nozzle tip is clean and free of any blobs or buildup. A dirty tip can drag or snag the delicate bridging lines, causing immediate failure.
- Print Direction:
- Action: Where possible, orient the part so the bridging lines run parallel to the direction of the part cooling fan’s airflow. This maximizes cooling efficiency along the span.
Final Thoughts
Poor bridging is a battle against Gravity and Heat. The solution is to make the plastic light and freeze it instantly.
- Maximize Cooling: Set the Bridge Fan Speed to 100%(depends on your filament).
- Reduce Flow: Set the Bridge Flow Ratio to 75-90% to deposit less material.
- Reduce Speed: Set the Bridge Speed to a slow, controlled 15-30 mm/s to allow time for cooling.
By reducing the amount of plastic and freezing it quickly with maximum fan power, you will significantly improve the quality and reliability of your horizontal spans.
Happy printing!