Fix poor surface quality above supports. Get the ultimate guide to support interface settings for Cura, PrusaSlicer,Bambu Studio, and OrcaSlicer.
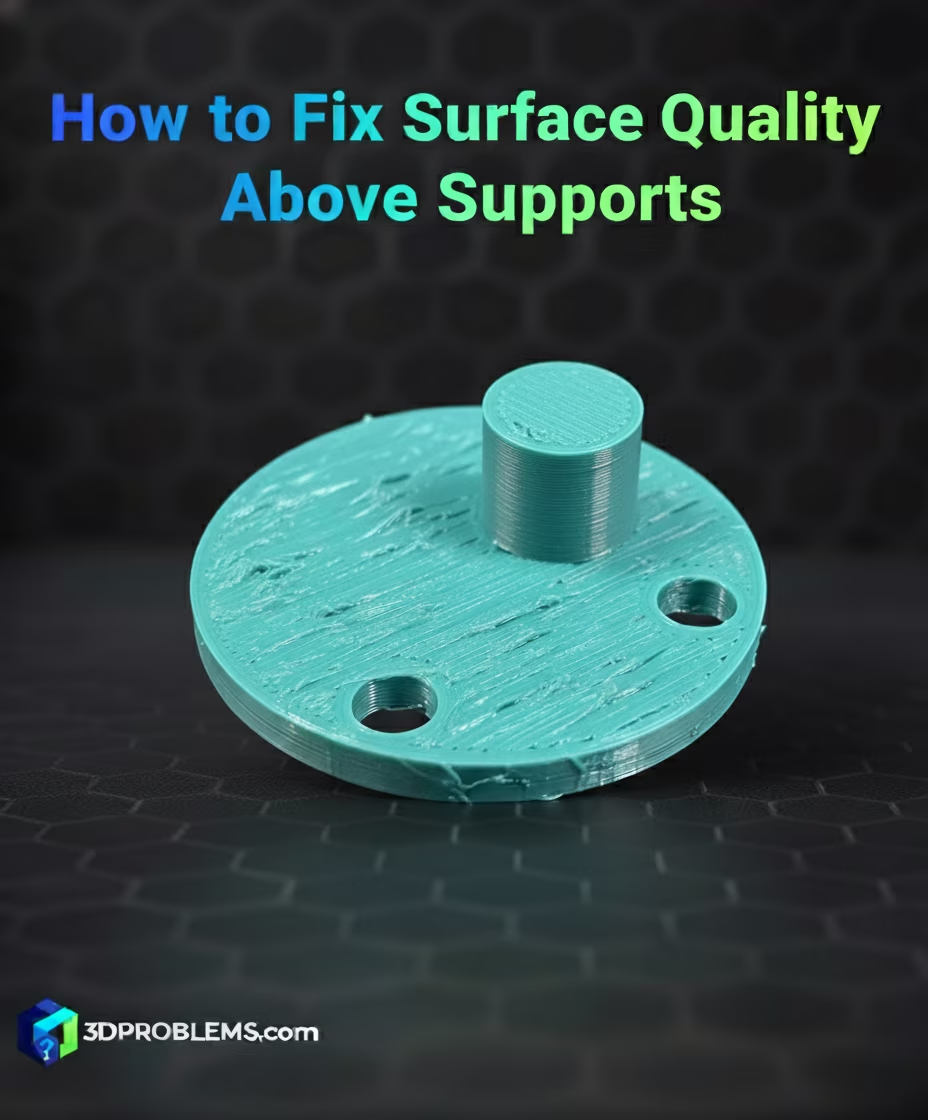
What Causes Poor Surface Quality Above Supports?
Poor surface quality occurs because the molten plastic of the print layer is deposited onto thin, non-solid support structure lines instead of a flat, solid surface. The material sags, deforms, and fuses poorly with the thin support layer.
The fundamental process is:
- Excessive Support Gap (Z Distance): The air gap between the top of the support and the bottom of the print is too large, causing the deposited filament to span a large distance and sag significantly.
- Insufficient Support Density: The support structure underneath is too sparse, providing inadequate coverage for the printed material to bridge onto.
- Missing Support Roof (Interface Layer): The slicer is not generating a dense, solid ‘roof’ layer on top of the sparse support structure, which is essential for a good surface finish.
- Printing Temperature: The temperature is too high, keeping the plastic molten for too long and increasing the amount of sag.
- High Print Speed: Printing the layers directly above supports too quickly leads to poor cooling and fusion.
The primary factors you need to control are Support Z Distance, Support Roof Density, and Temperature/Cooling.
Cura Poor Surface Above Supports Fix: Essential Settings
Cura settings offer detailed control over the support interface layers, which are the most critical element for fix poor surface quality above supports
1. Support Z Distance (Interface Gap)
- Cura Setting: Found under Support -> Support Z Distance.
- Function: This controls the vertical air gap between the top of the support and the bottom of the print. A value too large causes sagging.
- Actionable Advice: Reduce the Support Z Distance. Ideal values are often 0.1 mm or 0.2 mm (or one layer height for the bottom-most supported layer). A minimal gap ensures minimal sag but makes removal harder.
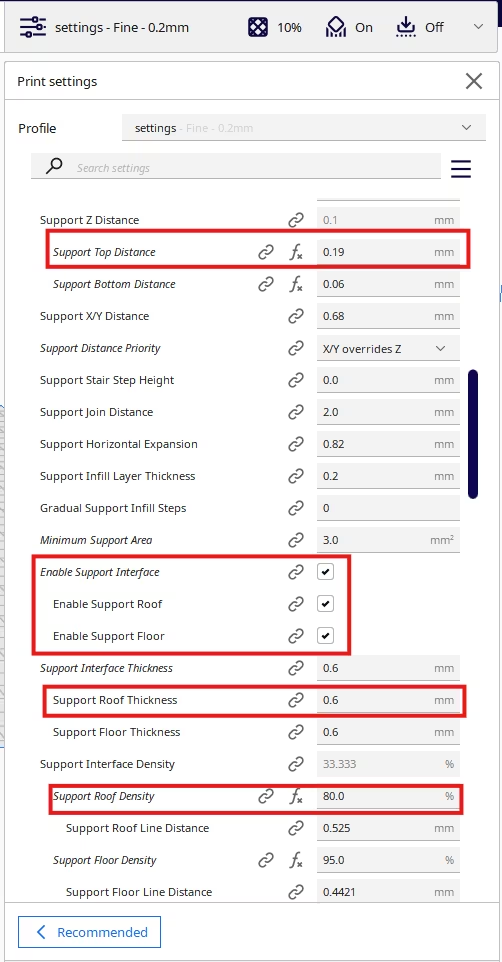
2. Support Roof Density
- Cura Setting: Found under Support -> Support Roof Density.
- Function: This creates a dense, solid layer on the very top of the support structure, acting as a temporary print bed. This is the most effective setting for improving surface quality.
- Actionable Advice: Enable Support Roof and set the Density to a high value, typically 80-100%.
3. Support Roof Thickness/Layers
- Cura Setting: Found under Support -> Support Roof Thickness or Support Roof Layers.
- Function: Controls how many dense interface layers are printed.
- Actionable Advice: Set the Support Roof Layers to 2-3 layers. Multiple layers ensure a smoother, more solid foundation for the supported part.
4. Bridge Flow Ratio
- Cura Setting: Found in the experimental settings -> bridging tab Look for bridge flow settings.
- Function: Affects the material volume for the first layer bridging the support gaps.
- Actionable Advice: Set the Bridge flow ratio to a value slightly below 1.0 (e.g., 0.9-0.95). This ‘pulls’ the bridging plastic taut, reducing sagging.
5. Bridge Speed
- Cura Setting: Found in the experimental settings -> bridging tab. Look for Bridge skin speed.
- Function: Adjusts bridge skin speed.
- Actionable Advice: Reduce The Bridge Skin Speed to a very slow value (e.g., 15-25 mm/s). This reduces the force and allows the plastic to cool and bond with the interface layer before sagging.
PrusaSlicer Poor Surface Above Supports Fix: Essential Settings
PrusaSlicer settings offer detailed control over the support interface layers, which are the most critical element for fix poor surface quality above supports.
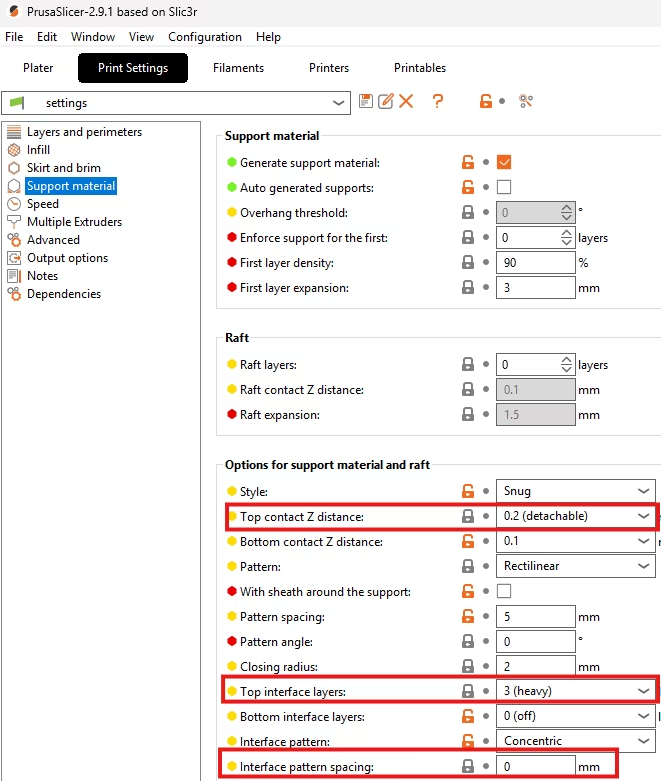
1. Contact Z Distance
- PrusaSlicer Setting: Navigate to fix poor surface quality above supports. Print Settings -> Support Material -> Options. Look for Contact Z distance.
- Function: The vertical air gap between the support top and the print bottom.
- Actionable Advice: Reduce the Contact Z distance to the minimum practical value for your printer, typically 0.1 mm or 0.2 mm. Note that reducing this value may require using the Support Material Interface to ensure removability.
2. Top Interface Layers
- PrusaSlicer Setting: Navigate to Print Settings -> Support Material -> Options. Look for Support material interface.
- Function: This enables the dense ‘roof’ layer that acts as the temporary print surface.
- Actionable Advice: Enable Support Material Interface. Set the Interface Layers to 2-3 and the Interface Pattern Spacing to a low value (e.g., 0.2-0.4 mm) to create a high-density solid surface.
3. Interface Pattern Spacing
- PrusaSlicer Setting: Navigate to fix poor surface quality above supports. Print Settings -> Support Material -> Pattern. Look for Pattern spacing.
- Function: The general density of the main support structure.
- Actionable Advice: While not the roof, a denser main support (lower Pattern spacing) can help stabilize the support structure itself, leading to a better surface finish.
4. Bridge Flow Ratio
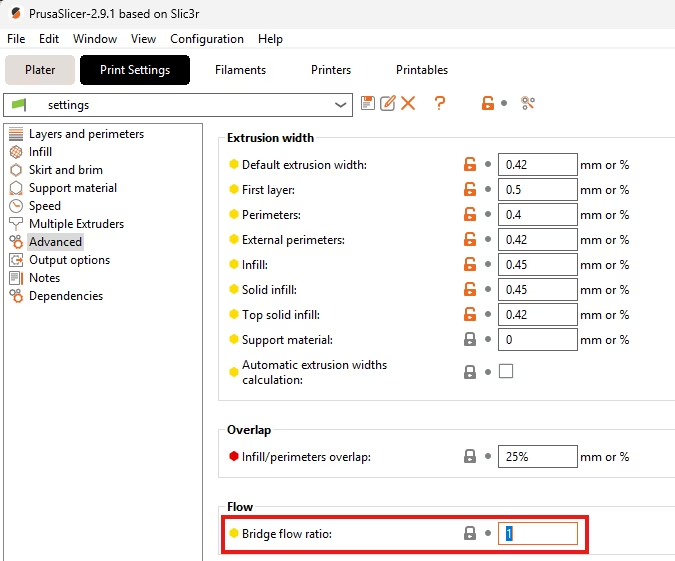
- PrusaSlicer Setting: Navigate to Filament Settings -> Extrusion Multiplier. Look for Bridge flow ratio.
- Function: Affects the material volume for the first layer bridging the support gaps.
- Actionable Advice: Set the Bridge flow ratio to a value slightly below 1.0 (e.g., 0.9-0.95). This ‘pulls’ the bridging plastic taut, reducing sagging.
5. Bridge Speed
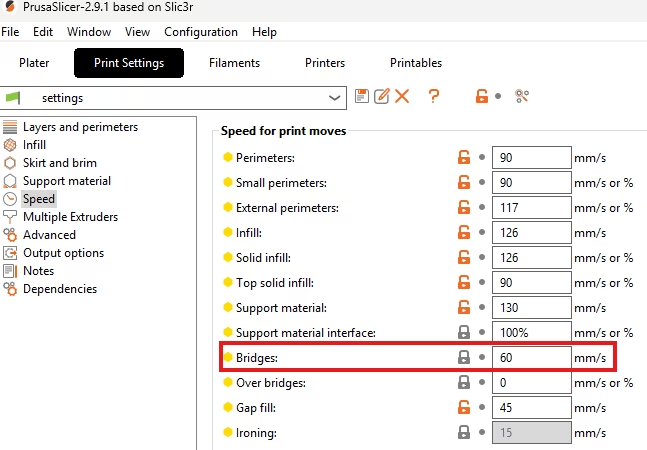
- PrusaSlicer Setting: Found in the Print settings -> Speed tab. Look for Bridge speed.
- Function: Adjusts bridge speed.
- Actionable Advice: Reduce the Bridge speed to a very slow value (e.g., 15-25 mm/s). This reduces the force and allows the plastic to cool and bond with the interface layer before sagging.
Orca Slicer(Bambu Studio) Poor Surface Above Supports Fix: Essential Settings
Orca Slicer(precessor bambu studio) settings provide robust controls for the support interface and bridging to fix poor surface quality above supports.
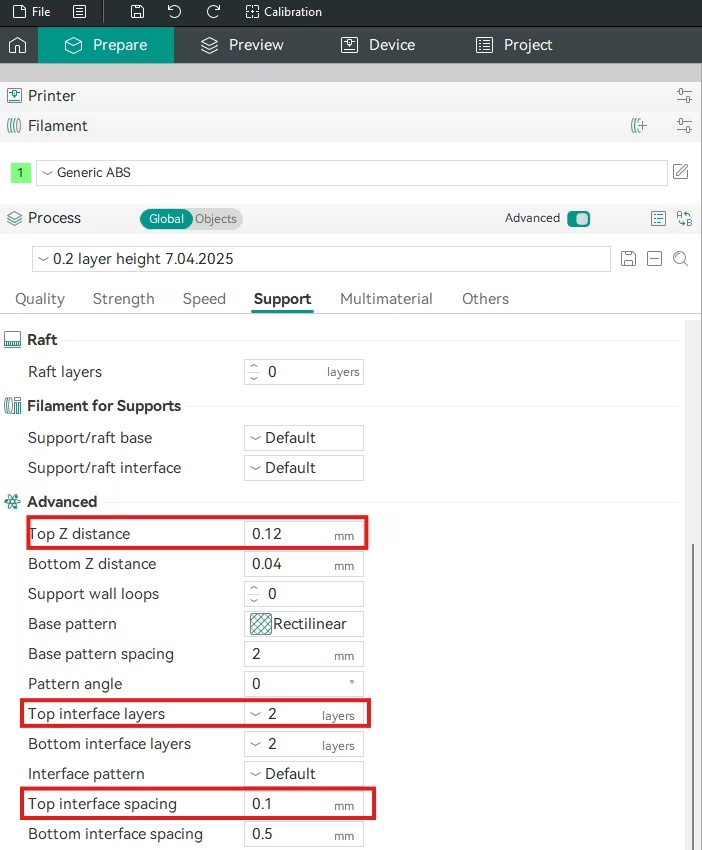
1. Top Z Distance (Support Z Gap)
- Orca Slicer Setting: Found in the Support tab. Look for Top Z distance.
- Function: The vertical separation between the print and the support roof.
- Actionable Advice: Reduce the Top Z distance to a minimal value (e.g., 0.1-0.2 mm).
2. Top Interface Layers And İnterface Spacing
- Orca Slicer Setting: Found in the Support tab. Look for Top interface layers.
- Function: The number of dense roof layers.
- Actionable Advice: Set Top interface layers to 2-4 and the Top interface spacing to a low value (e.g., 0.2 mm) to create a dense, temporary base.
3. Bridge Speed
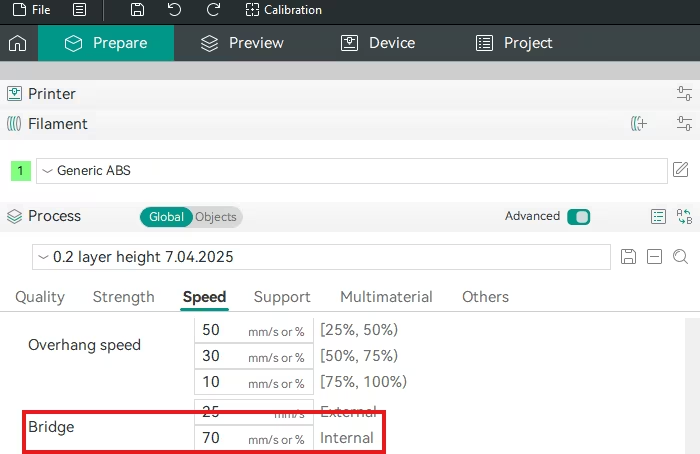
- Orca Slicer Setting: Found in the Speed tab. Look for Bridge speed.
- Function: Adjusts bridge speed.
- Actionable Advice: Reduce the Bridge speed to a very slow value (e.g., 15-25 mm/s). This reduces the force and allows the plastic to cool and bond with the interface layer before sagging.
4. Bridge Flow Ratio
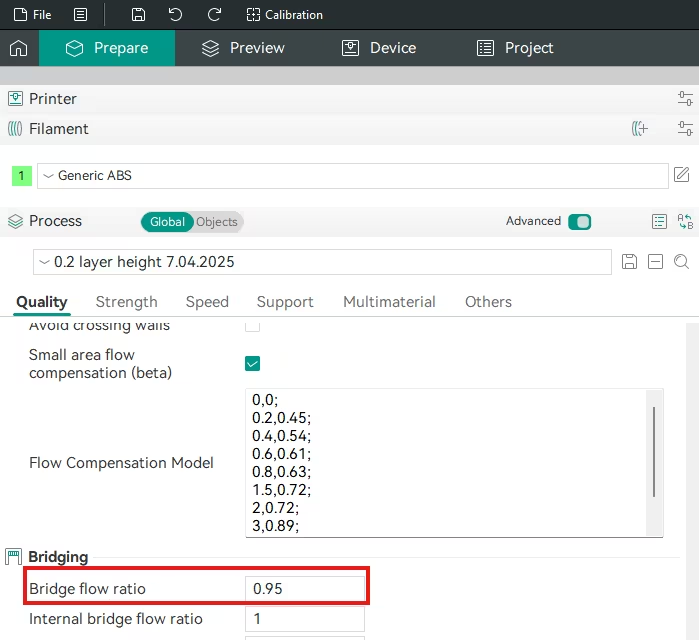
- Orca Slicer Setting: Navigate to Quality Settings -> Bridging tab. Look for Bridge flow ratio.
- Function: Affects the material volume for the first layer bridging the support gaps to fix poor surface quality above supports.
- Actionable Advice: Set the Bridge flow ratio to a value slightly below 1.0 (e.g., 0.9-0.95). This ‘pulls’ the bridging plastic taut, reducing sagging.
Universal Non-Slicer Fixes (Must-Do)
If the supported surface remains poor, a physical or material change is needed to fix poor surface quality above supports:
- Use Water-Soluble Supports (PVA/BVOH):
- Action: If your printer has a dual extruder, use a dedicated water-soluble support material. This allows you to set the Support Z Distance to 0 mm, eliminating the air gap entirely and guaranteeing a near-perfect supported surface finish.
- Increase Part Cooling Fan:
- Action: Maximize the Part Cooling Fan speed 100%(depends on your filament). Aggressive cooling is vital for supported layers to freeze the plastic before it can sag through the gaps.
- Print Temperature Reduction:
- Action: Reduce the overall printing temperature by 5°C. Less heat means the plastic is less fluid and will sag less when unsupported.
Final Thoughts
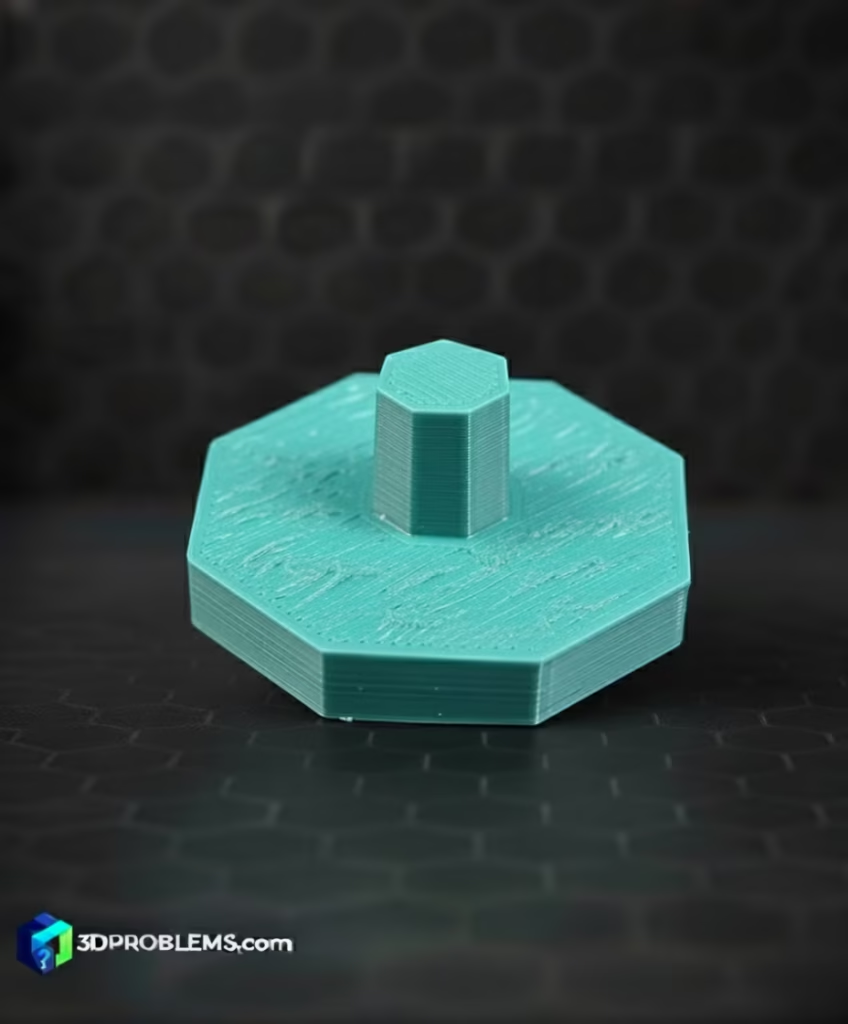
Poor surfaces above supports are a classic trade-off between removability (air gap) and quality (solid support roof). Sacrifice a small amount of easy removal for a major increase in surface quality.
- Use a Support Roof: This is the most important setting for fix poor surface quality above supports.. Set Support Roof Density to 80-100% with 2-3 Interface Layers.
- Minimize Z Distance: Reduce the Support Z Distance to 0.1 mm or 0.2 mm.
- Slow Down Bridging: Print the layer immediately above the supports at a very slow speed (15-25 mm/s).
By creating a dense, temporary foundation for fix poor surface quality above supports and ensuring minimal vertical separation, you will achieve smooth, high-quality surfaces on supported areas.
Happy printing!