Struggling with temperature swings? This guide teaches you how to PID tune 3D printer. Achieve perfectly stable temperatures for higher quality prints.
What is PID Tuning and Why Is It Vital?
Have you ever watched your printer’s temperature reading on its screen? You set it to 200°C, but you see it constantly bouncing between 197°C and 203°C.
These small, seemingly harmless temperature swings are a hidden enemy of print quality. They cause inconsistent extrusion, which shows up on your finished prints as:
- Z-Banding: Ugly, repeating lines or “ribbing” on smooth vertical walls.
- Weak Layer Adhesion: Layers that don’t bond well and can be easily pulled apart.
- Inconsistent Surface Finish: Some layers look matte, others look glossy.
This is where PID Tuning comes in.
A PID Controller (Proportional, Integral, Derivative) is the algorithm your printer’s firmware uses to manage its heaters (both the hotend and the bed). Its one and only job is to reach a target temperature and hold it with extreme precision.
Your printer’s default, out-of-the-box settings are just “good enough” guesses. By running a PID tune, you are “teaching” the firmware the exact thermal behavior of your specific heater, thermistor, and power supply. The result? Rock-solid, stable temperatures and dramatically cleaner prints.
When Should You Perform a PID Tune?
While you don’t need to do it daily, this guide to 3D printer PID tuning is vital if you:
- Just assembled a new printer or updated its firmware.
- Change your nozzle (especially to a different material, like brass to hardened steel).
- Replace the heater cartridge or thermistor (the temperature sensor).
- Install a new part-cooling fan shroud (this changes the airflow over the heater block).
- Notice your temperatures are fluctuating by more than +/- 1°C.
How to PID Tune 3D Printer (Step-by-Step)
The PID tuning process is simple, but the commands and saving method change depending on your printer’s firmware.
The two most common systems are Marlin (used by most Creality, Anycubic, and Prusa printers) and Klipper (used with Fluidd/Mainsail interfaces). We’ll cover both.
You will need a terminal to send G-code commands (e.g., Pronterface, OctoPrint, Simplify3D, or the Fluidd/Mainsail console).
Method 1: For Klipper-Based Printers (Fluidd/Mainsail)
The Klipper PID tuning workflow is different. Settings are saved to your printer.cfg file, and the M500 command is not used.
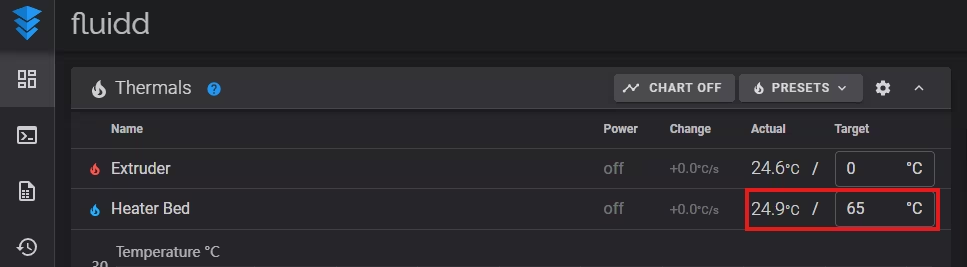
1.Set Part Fan: 100 and set heater bed: 65 for suit printing conditions:

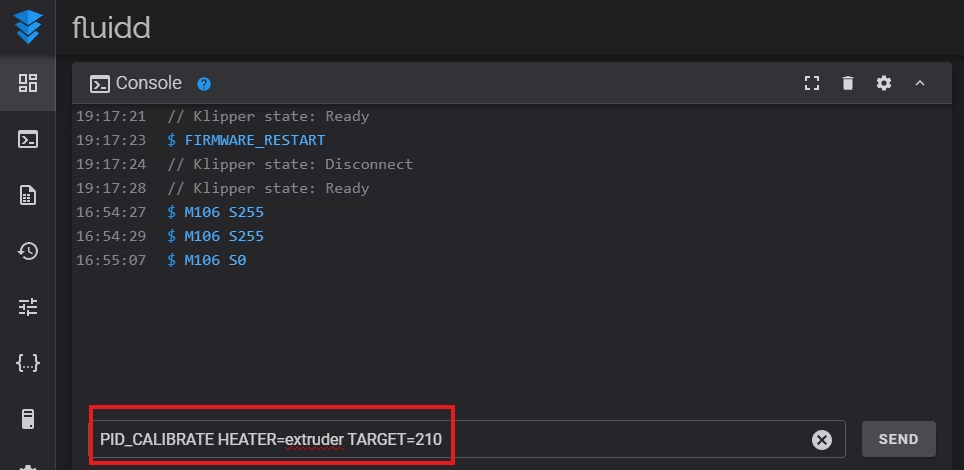
2. Tune the Hotend (Nozzle): In the console, type this (targeting 210°C):
PID_CALIBRATE HEATER=extruder TARGET=210
HEATER=extruder: Points to the[extruder]section in yourprinter.cfg.TARGET=210: Your target temperature.
When finished, the console will give you the pid_Kp... results.
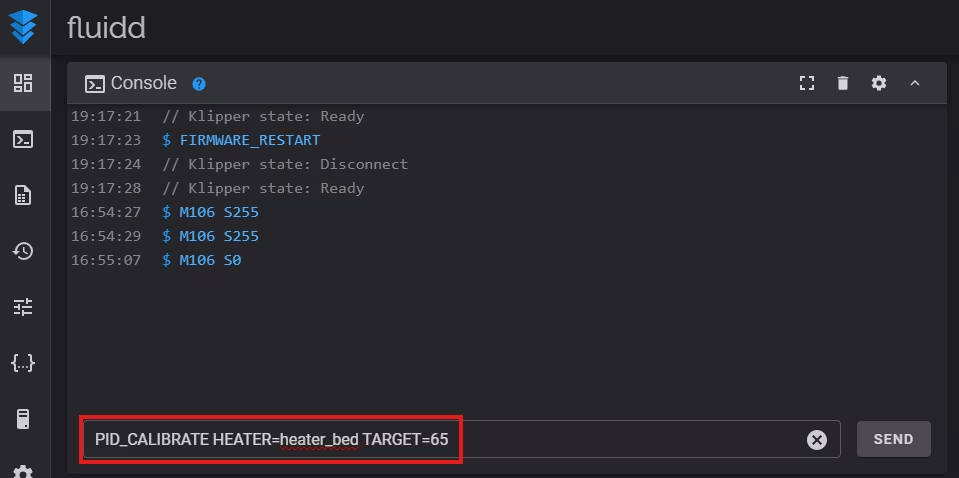
3. Tune the Heated Bed: Now, do the same for the bed (targeting 60°C):
PID_CALIBRATE HEATER=heater_bed TARGET=60
HEATER=heater_bed: Points to the[heater_bed]section in yourprinter.cfg.
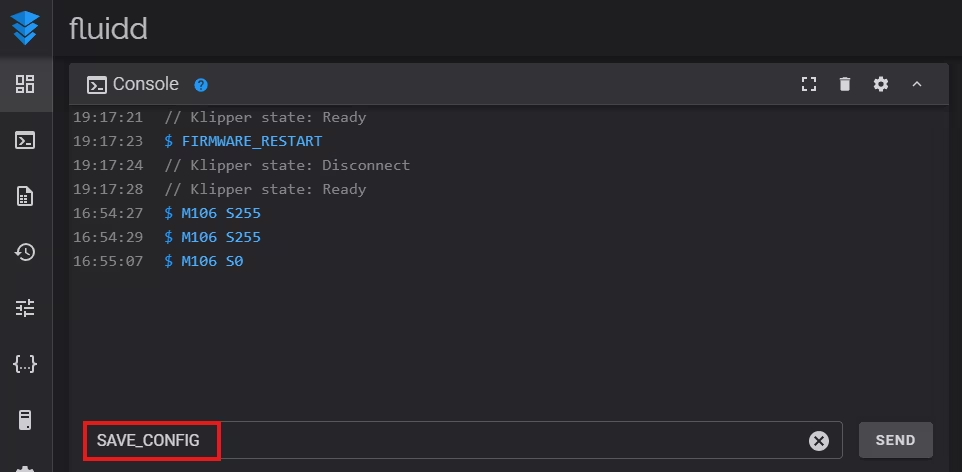
4. Save the Settings (The Most Important Step): After you have run both tunes, you just need to send one final command to the console to make them permanent:
SAVE_CONFIG
This single command tells Klipper to find the new PID values, write them to your printer.cfg file automatically, and restart.
Method 2: For Marlin-Based Printers (Creality, Anycubic, etc.)
For Marlin PID tuning, you run the tune and then use the M500 command to save the results to the printer’s internal memory (EEPROM).
1. Tune the Hotend (Nozzle): Let’s target 210°C, a common temperature for PLA.
M303 E0 S210 C8
M303: The PID autotune command.E0: Targets the hotend (Heater 0).S210: The target temperature to tune for.C8: The number of cycles to run for accuracy.
The process will take a few minutes. When finished, the terminal will show you the new values, like this: #define DEFAULT_Kp 21.73 #define DEFAULT_Ki 1.25 #define DEFAULT_Kd 94.28
Now, immediately enter these new values using the following commands:
M301 P21.73 I1.25 D94.28
M500
M301sets the new PID values for the hotend.M500saves the settings permanently.
2. Tune the Heated Bed: Now, let’s do the same for the bed (e.g., at 60°C)
M303 E-1 S60 C8
E-1: Targets the heated bed.
When it’s done, it will give you new Kp, Ki, and Kd values. Use M304 to enter them:
M304 P88.14 I10.21 D319.45
M500
M301is for the hotend,M304is for the bed. TheM500command saves the new setting.
Conclusion: Rock-Solid Temperatures Achieved
That’s it! Regardless of your firmware, your printer’s heaters are now perfectly tuned.
Go ahead and heat your hotend. Watch the temperature graph. Instead of a wavy line, you should see it climb quickly to the target and stick to it, barely moving by even half a degree.
You’ve just eliminated one of the biggest hidden sources of print quality issues. This calibration, combined with a proper E-Step Calibration, builds a reliable foundation for all your future prints.